Configuring a design
Say you found an SQL injection during a pentest. To exploit it using ending, you need to create a design, which is a python class that defines your injection. You then test it, run queries, and dump the database schema.
Creating a design (create, edit)
Pick a name, say my-design, and use create to create a new design:
$ ending my-design create
To edit it, use edit.
$ ending my-design edit
It'll open your design file with your file editor.
Note
Ending is heavily documented and typed. Make sure the ending library is in the python path to get autocompletion and typing information from your IDE, which greatly helps for development.
Note
By default, ending creates an HTTPDesign, which is suited for SQL injections over HTTP. If you need to use another protocol, just change the base class to Design.
The created design contains a single method, send().
Setting up your favourite editor
By default, ending tries to open the file with the environment variable EDITOR, if set. Otherwise, it falls back to your OS's natural handler: xdg-open for linux, open for Mac, and os.startfile() for Windows.
Importing a design from an HTTP request (import)
If you already have the HTTP request you want to inject, you can use import to create a design pre-filled with the corresponding send() method. ending will prompt you to paste the request, then press Ctrl-D to confirm.
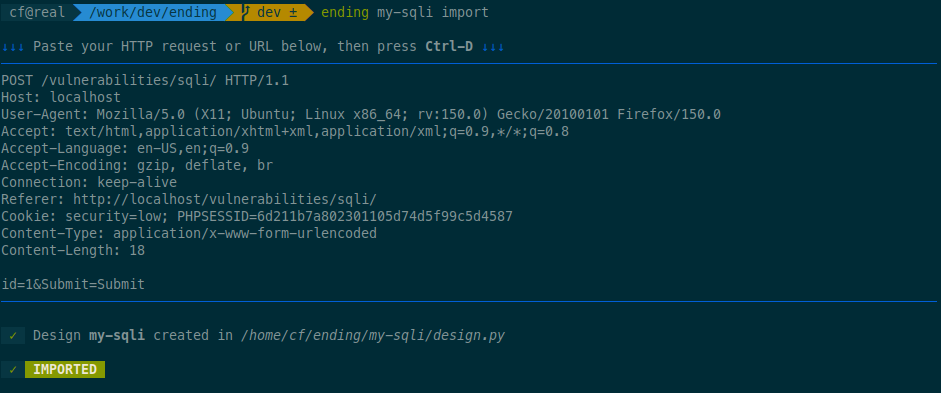
You can also directly pipe the HTTP request:
$ ending my-design import < my-request.txt
Or a bare URL:
$ ending my-design import < <(echo 'https://target.com/page?id=4')
Either way, the design file is opened in your editor right after. Query parameters, headers, cookies, and the request body (JSON, form-encoded, or multipart) are all handled automatically.
Note
If the design already exists, use --force (or -f) to overwrite it.
The generated send() method reproduces the request exactly as captured — you only need to splice in payload where the injection should go.
The send() method
The first step in setting up our design is to edit the Design.send() method. This method is called to send the payload to the server and return the response.
For web SQL injections, this generally consists in sending an HTTP request to the vulnerable page, and returning the response.
class Design(HTTPDesign):
    async def send(self, payload: str) -> bytes:
        response = await self.session.post(
            'http://target.com/api/news',
            params={
                "id": payload
            }
        )
        return response.content
That's it!
Note
The Session has exactly the same API than the one from the requests library. The only difference is that its get() and post() methods are asynchronous, and require the use of the await keyword.
Choosing an HTTP backend
ending ships three HTTP designs, each wrapping a different HTTP client. They share the same interface — PROXY/WORKERS settings, and a latency attribute on every response (the time, in seconds, the request took between leaving and the response arriving) — so you can swap between them without touching the rest of your design.
- HTTPDesign: the default. Its
sessionis backed by therequestslibrary, with the asynchronousget()/post()described above. - AIOHTTPDesign: its
sessionis anaiohttp.ClientSession. - HTTPXHTTPDesign: its
sessionis anhttpx.AsyncClient.
HTTPDesign is the default mostly because people are used to requests; the two others will generally provide greater performance.
To pick one, just change the base class of your Design:
class Design(AIOHTTPDesign):
    async def send(self, payload: str) -> bytes:
        ...
Automatic configuration (configure)
If the injection is simple enough, ending can configure it itself. Go back to the CLI and run:
$ ending my-design configure
If everything goes well, ending will automatically configure the design for you. Otherwise, you might have to adjust your send() method, or configure the design manually. Check here to see how it is done.
Here's an example of a successful configuration:
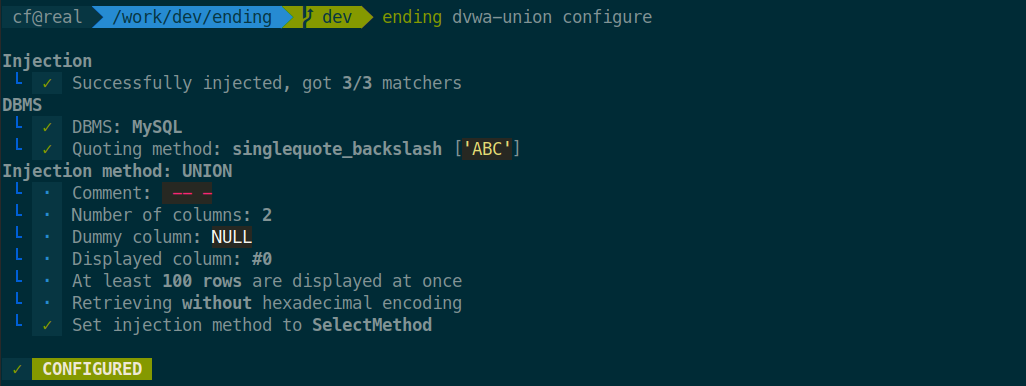
Check your design file: it now contains additional methods, such as set_method() and inject(). You can now validate the design.
Testing a design (validate)
Once ready, validate that the design behaves properly using validate. After checking the looks of your design, it will issue several test queries to ensure everything works properly, and make suggestions as to why it does not.
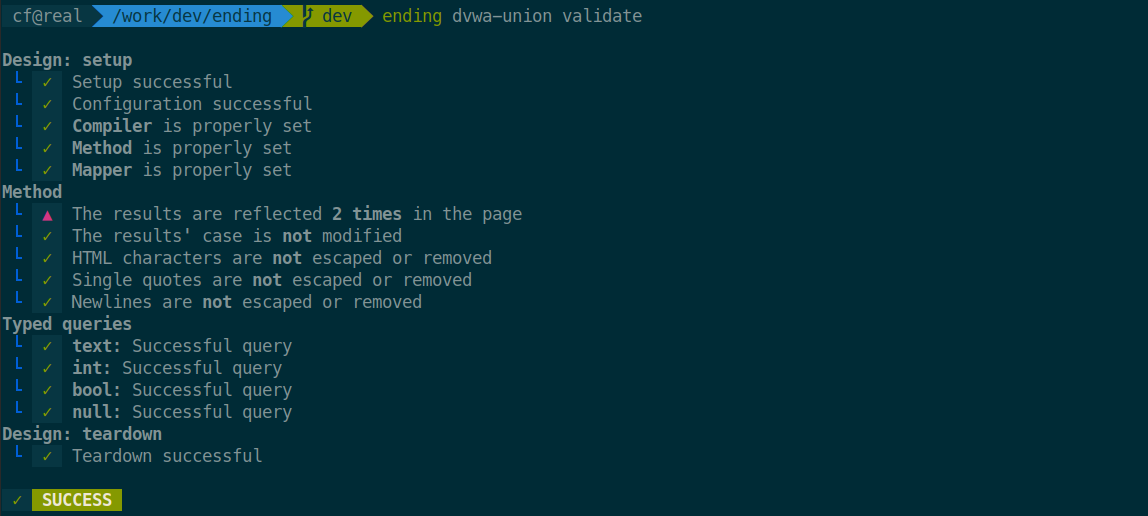
If it works, you're good to go. Otherwise, a human-readable error will be displayed if possible, or you'll get a stacktrace to debug the whole thing.
When the validation is successful, you can use the design to run queries or dump the database schema.
Using the design
You're now ready to use the design to run arbitrary SQL queries or dump the database schema.
Advanced configuration
Proxy
A proxy can be set using the HTTP(S)_PROXY environment variables, when running the script:
$ HTTPS_PROXY=http://localhost:8080 ending my-design query -f 'user()' 'version()'
Otherwise, the HTTPDesign class can bear a PROXY argument that sets a proxy for the requests.
class Design(HTTPDesign):
    PROXY = "http://localhost:8080"

    ...
Number of concurrent connections
In addition, one can set the maximum number of concurrent requests with WORKERS (defaults to 2):
class Design(HTTPDesign):
    WORKERS = 4

    ...